• Quick Inspection Tips: Learn how to promptly identify signs of storm damage on your roof, ensuring early detection and prevention of further harm.
• Professional Help: Understand why hiring an expert for a thorough inspection and repair is crucial for maintaining your roof’s integrity and safety.
• Stay Informed: Keep up-to-date with the latest in roof maintenance and damage prevention by connecting with us through our social media page.
Recognizing Problematic Signs
The aftermath of a storm can leave your home vulnerable, particularly your roof which often bears the brunt of the weather’s fury. It’s crucial to identify potential trouble early, starting with ensuring your own safety. Before delving into inspection protocols, confirm that the storm has subsided and it is safe to step outside. Don the right safety gear, especially sturdy footwear if you need to use a ladder at any point during the inspection.
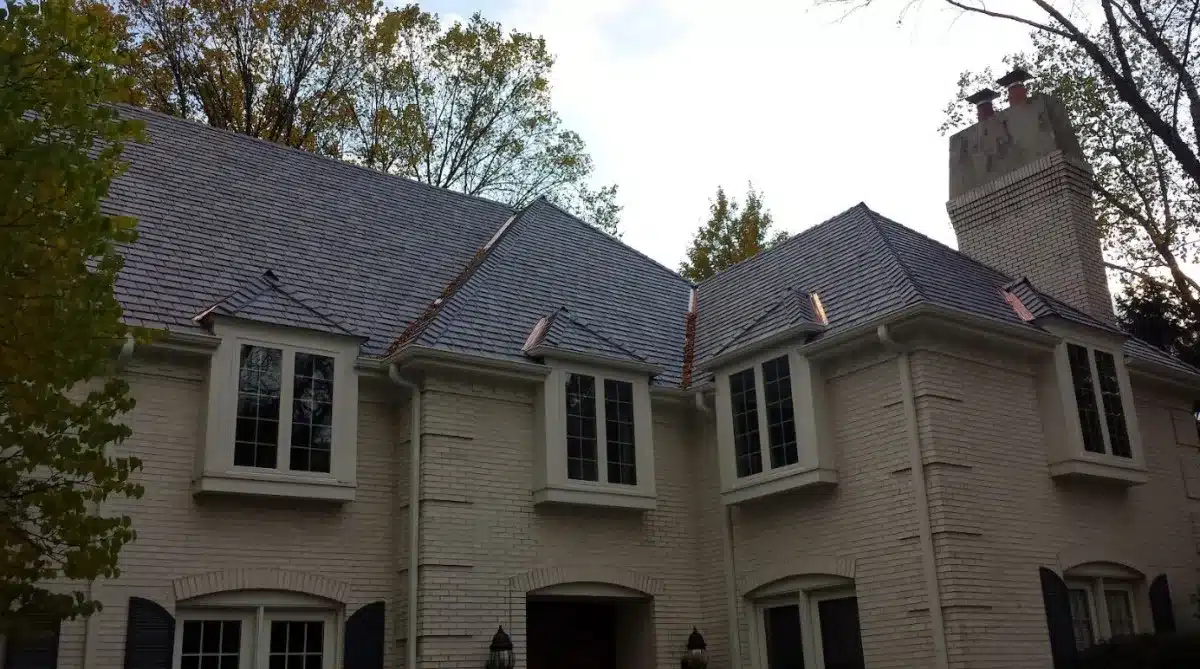
Once outside, your initial assessment should be done from the safety of the ground. Keep an eye out for obvious indicators of roof trauma such as dislodged shingles, metallic elements that may have separated from the chimney area, or assorted debris scattered on your property. These signs can point to a compromised roof integrity that needs further detailed inspection. Acknowledging these red flags early could significantly reduce the extent and cost of necessary repairs.
Your gutter system can also reveal important clues about the state of your roof. A surplus of granules in the gutters indicates that your shingles have undergone wear, and if you find the downspouts clogged with these granules, it could mean it’s time for serious roof maintenance. Pay particular attention to any missing or damaged sections, as missing shingles suggest a breach exposed to the elements, and damages like cracks or curls can compromise the roof’s stability.
Detailed Examination of Shingles and Flashing
The integrity of your roof largely depends on the condition of the shingles and flashing; even a single compromised shingle can be an ingress for water damage. When inspecting for damage, look for shingles that are missing, cracked, curled, or bear impact marks from hail or debris. Such damage should not be taken lightly, as it can lead to leaks and more extensive internal damage over time. Proceed with a careful inspection of the flashing—the metal strips that seal the roof’s edges and valleys—as these areas are particularly susceptible to storm damage.
Should you uncover areas of concern during your inspection, remember that timely, expert attention is crucial. For comprehensive roofing solutions, visit Owen Enterprises Inc.’s roofing systems for professional assistance. From there, a qualified team can provide the necessary repairs to safeguard the longevity of your roof. It’s important to act quickly—not only to repair existing damage but to fortify your home against potential future storms.
Step 1: Assess Safety Before Inspection
Ensure safety is the top priority. Before attempting to identify storm damage on your roof, check that the storm has fully passed, and it’s safe to go outside. Use caution and wear appropriate footwear when using a ladder to access the roof.
Step 2: Begin with a Ground-Level Inspection
Initiate your roof check from the ground. Look for visible signs of damage such as missing shingles, metal pieces dislodged from around the chimney, or debris on the ground that may have come from the roof.
Step 3: Check the Gutters and Downspouts
Inspect your gutters and downspouts for granules that may have come loose from the shingles, which is a sign of roof damage. Excessive amounts could indicate that shingles need to be replaced.
Step 4: Look for Damaged or Missing Shingles
Closely examine the condition of your roof shingles. Check for any that are missing, cracked, curled, or torn. These are indicators that the roof may have endured storm damage.
Step 5: Inspect the Flashing for Tears or Buckling
Assess the metal strips, known as flashing, that seal transitions on your roof. Look for bent, torn, or buckled flashing, as these are vulnerable spots for water leaks after a storm.
Step 6: Examine the Roof for Standing Water
After the storm, check for any water pooling or stains on the roof, which are warning signs of potential water damage and possibly a compromised roofing structure.
Step 7: Document All the Damage
Take clear photos and detailed notes of all the damage you’ve found. This documentation is crucial for insurance claims and discussions with professional roofing contractors.
Step 8: Consult with a Professional Roofing Contractor
For a comprehensive examination, contact a local, trustworthy roofing contractor with experience in storm damage. They can provide a more in-depth analysis and undertake any necessary repairs.
Remember, regular roof inspections and prompt post-storm assessments can help you prevent further damage to your home. If you live in Burr Ridge, IL, consider seasonal checks before winter storms and immediately after any severe weather events.
Common DIY Roof Inspection Mistakes to Avoid
While the initiative to inspect your roof for storm damage is commendable, attempting it without proper knowledge can lead to more harm than good. Many well-meaning homeowners commit errors that can compromise their safety or lead to incomplete inspections. Understanding these common oversights can help ensure a more effective and secure approach to identifying storm-induced roof problems.
Mistake 1: Neglecting Personal Safety
Not wearing appropriate safety gear or using a ladder improperly can lead to accidents. Always ensure that the ground is stable and the ladder is secure before climbing, and never conduct a roof inspection alone. Wearing non-slip shoes is also critical to prevent falls.
Mistake 2: Starting the Inspection Too Soon After the Storm
Inspecting the roof while the weather is still unstable can be dangerous. It’s essential to wait until the storm has fully passed and the roof is dry to avoid slips and injuries. Patience here is not only a matter of effectiveness but of personal safety.
Mistake 3: Inadequate Ground-Level Examination
Skipping a thorough ground-level inspection can mean missing visible signs of damage. Take the time to walk around the entire perimeter of your home, looking for fallen debris and damaged elements. A rushed inspection might overlook critical signs that are easily visible from the ground.
Mistake 4: Ignoring the Gutter System
The gutters and downspouts can offer vital clues about the condition of your shingles. Not checking them for granules or blockages can result in overlooked shingle deterioration. Ensure that your inspection includes a thorough check of these components.
Mistake 5: Overlooking Shingle Damage
Misidentifying or ignoring damaged shingles can lead to significant roof issues. Not all damage is easily noticeable, so it’s necessary to look for subtle signs, such as minor cracks or slight curling. Every damaged shingle is a potential leak during the next rain.
Mistake 6: Disregarding Flashing and Seals
Flashing and seals are crucial for keeping water out. Failure to inspect them for tears, buckling, or dislocation can result in unseen leaks that slowly deteriorate your home’s structure. Remember, flashing integrity is as crucial as the shingles themselves.
Mistake 7: Poor Documentation of Damage
Inadequately documented damage can complicate insurance claims. It’s important to take detailed photos and notes, capturing the extent and location of all damages. Proper documentation can expedite the repair process and ensure that you receive adequate coverage from your insurer.
Mistake 8: Not Consulting Professionals When Necessary
DIY can be cost-effective, but some damages require professional expertise. Avoid the mistake of underestimating the severity of roof damage—a professional contractor can offer a thorough assessment and solution that goes beyond what a layperson can safely manage. Always weigh the complexity of the damage against the merit of expert intervention.
Navigating Insurance and Documentation
After a storm, assessing the extent of roof damage is critical, but documenting it effectively is just as important for insurance purposes. A well-documented case can simplify the claims process, aiding in receiving the reimbursement needed for repairs. Capture clear photographs from multiple angles and jot down detailed notes of all damages.
If you’re unsure about the claims process or require help verifying the damage, guidance from seasoned professionals can be invaluable. For expertise in dealing with storm damage and insurance, consult with Owen Enterprises Inc. Their knowledge and experience ensure proper documentation, making the insurance process smoother for homeowners.