• Discover the benefits of cedar roof treatment, including increased durability and weather resistance
• Learn step-by-step methods for applying cedar roof treatments effectively to protect and maintain your investment
• Understand why professional assistance ensures the success and longevity of your cedar roof treatment initiatives
Identifying Potential Issues with Your Cedar Roof
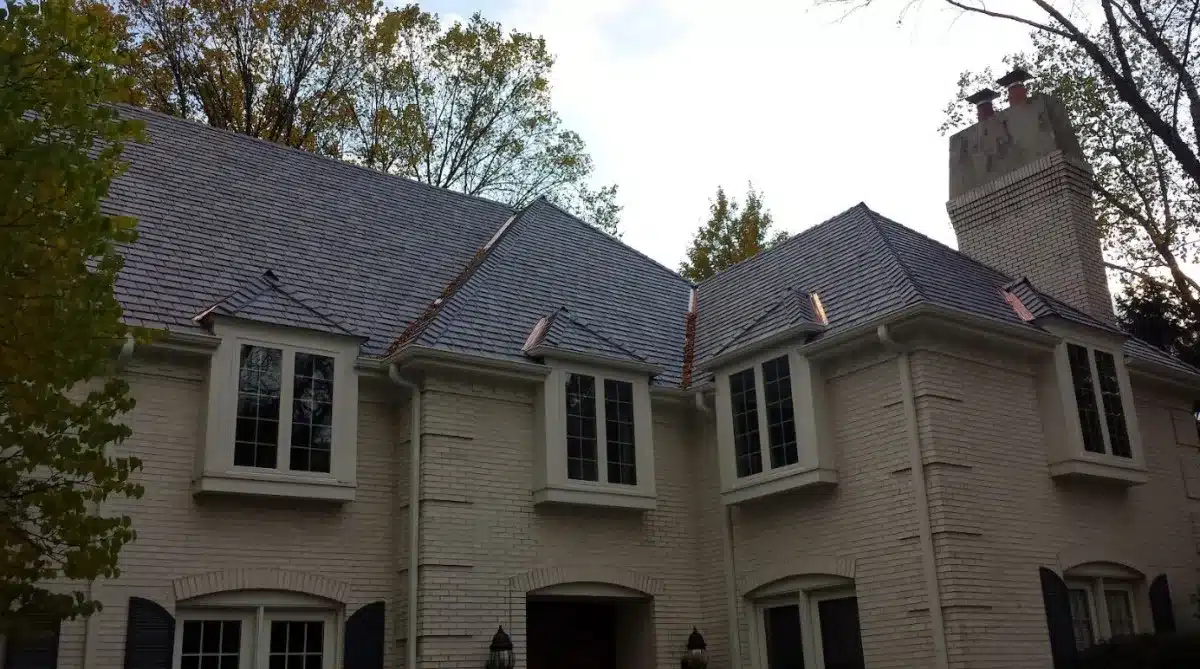
There’s a distinctive charm to a cedar roof that gives your home a touch of natural elegance, but it requires attentiveness to maintain its beauty and functionality. The onset of problems is often subtle, so it’s crucial to know what signs indicate the need for a closer look. Discoloration and a dull appearance can be early indicators, revealing that the cedar may be losing its natural oils and resilience. Often, this change in hue also hints at exposure to excess moisture, which invites moss and algae to take hold.
While inspecting, pay special attention to the shingle’s physical state; cracked, curled, or missing shingles aren’t just cosmetic flaws—they spell trouble. These defects allow water to penetrate and cause damage to the underlying roof structure, leading to costly repairs down the line. Additionally, check for an accumulation of debris such as leaves and twigs, which can trap moisture and decompose, creating a fertile ground for undesirable organic growth.
Furthermore, areas with conspicuous moss and algae growth require immediate action to prevent degradation of the wood fibers in your cedar shingles. This organic invasion doesn’t just mar the visual appeal; it can actually lift and separate the shingles, compromising your roof’s protective capabilities. A keen eye and proactive stance in cedar roof care can head off potential problems, preserving the integrity of your home’s crowning glory.
Cleaning and Preparing Your Cedar Roof for Treatment
Initiating the treatment process requires a clean slate, which means your cedar shingles must be free of dirt, leaves, and organic invaders. A gentle, low-pressure wash will efficiently clear the surface, as harsh, high-powered streams can be too abrasive for the cedar’s softwood structure. This wash not only prevents physical damage but also ensures that subsequent treatment applications can adhere properly. It’s an essential prep stage that paves the way for a more effective and longer-lasting preservation.
Once the cleansing stage is complete, it’s imperative to tackle any moss, algae, or fungi—with Owen Enterprises Inc. offering professional insights and services. Using approved moss and algae removers not only cleanses the aesthetic of your roof but also safeguards the wood from biological damage. It’s a necessary step to take before any reparative work begins, ensuring a sound base for future treatment. When appropriately addressed, these preparations can extend the life expectancy of your cedar shingles, keeping your roof healthy and resilient through the seasons.
Step 1: Inspect Your Cedar Roof
Begin with a thorough inspection of your cedar roof to identify any existing damage, mold, moss, or areas that need treatment. Look for cracked, curled, or missing shingles.
Step 2: Clean the Roof Surface
Gently clean your cedar roof using a low-pressure wash to remove dirt, debris, and any organic growth. Make sure not to use high pressure, which can damage the shingles.
Step 3: Apply Moss and Algae Remover
Treat the cedar shingles with a solution designed to kill moss, algae, and fungi. This helps prevent damage and maintains the aesthetic appearance of the roof.
Step 4: Repair Any Damaged Shingles
Replace any broken or damaged shingles as part of your cedar roof maintenance. This prevents water infiltration and further damage to your roof structure.
Step 5: Apply Cedar Roof Treatment
Choose a quality cedar roof treatment product and apply it according to the manufacturer’s instructions to prolong the life of your cedar roof and enhance its natural beauty.
Step 6: Seal and Protect
Seal the cedar shingles with a protective coating that repels water and offers UV protection, which is crucial in preserving the wood and preventing discoloration.
Step 7: Regular Maintenance Checks
Schedule semi-annual inspections of your cedar roof to catch any potential issues early. This includes checking for signs of wear, assessing the condition of the treatment, and clearing away any debris.
Step 8: Professional Assessment
Consider having a professional roofer with experience in cedar roofs perform an annual inspection to provide expert advice and to ensure the longevity of your cedar roof treatment.
Common Mistakes to Avoid in Cedar Roof Maintenance
DIY cedar roof treatment can be a rewarding project, but it’s fraught with potential pitfalls that can compromise the integrity of your roof. Understanding these missteps is crucial to ensure that your efforts enhance rather than damage your cedar roofing. Each mistake below not only elucidates a common error but also provides insights on how to steer clear and execute the proper methods for an effective cedar roof maintenance routine.
Mistake 1: Neglecting Regular Inspections
Many homeowners forget that consistent inspections are fundamental to identifying issues on cedar roofs. Missing this crucial step can lead to undetected damage that worsens over time, resulting in costly repairs.
Mistake 2: Using High-Pressure Washing
Employing a high-pressure wash to clean your roof can strip away protective oils and damage the cedar shingles. It’s important to use a soft wash technique to prevent harming the integrity of the wood.
Mistake 3: Applying the Wrong Moss and Algae Products
Selecting the incorrect remover can be ineffective and potentially harm your cedar shingles. Make sure to choose treatments specifically designed for cedar roofs to avoid damaging the material.
Mistake 4: Delaying Shingle Repairs
Postponing the repair of cracked or missing shingles may lead to severe structural issues. Addressing repairs promptly prevents water infiltration and the need for more extensive repairs in the future.
Mistake 5: Overapplying Roof Treatments
Using too much treatment can lead to build-up that suffocates the shingles, preventing them from ‘breathing’. Apply treatments sparingly according to the manufacturer’s instructions to avoid this issue.
Mistake 6: Ignoring the Need for Sealant
Neglecting to apply a sealant after treatment leaves the cedar exposed to the elements. A quality sealant provides an extra layer of protection, enhancing the roof’s durability against various weather conditions.
Mistake 7: Skipping Routine Maintenance Checks
Irregular maintenance checks make it easy to overlook emerging problems. Scheduling semi-annual maintenance is key in catching issues early to maintain roof health.
Mistake 8: Overlooking Professional Help
DIY enthusiasts often underestimate the value of professional assessments. Having an expert roofer look at your cedar roof can provide insights that exceed the standard DIY examination and ensure the treatment is effective.
Repairing and Restoring Integrity to Your Cedar Roof
After ensuring a pristine surface, immediate attention should be given to repairing any impaired shingles. This not only restores the visual harmony of your roof but also serves as a critical defense against leaks and structural damage. Experienced professionals like those at Owen Enterprises Inc. can ensure that replacement shingles are installed seamlessly, blending in with the existing roofing and preserving its overall aesthetic integrity.
With repairs completed, applying a high-quality cedar roof treatment is the key to enriching and safeguarding your roof against environmental stressors. This treatment seeps into the wood, replenishing natural oils and creating a barrier against moisture and sun damage. Regular application of these treatments after routine inspections will contribute significantly to prolonging your roof’s longevity, keeping it robust and reliable.